
The Covid-19 pandemic brought to fruition many home-based startups and businesses. It’s no surprise that people realized the potential of online business and wanted to benefit from it as well. Now startups don’t have a huge budget and creating a full-fledged website with an interactive shopping cart is not only expensive but unnecessary if you are just starting. Here is where Gravity Forms for WooCommerce come in. They enable you to create, distribute, and manage your website forms through WooCommerce Gravity Forms integration.
With Gravity Forms, customers can pay for their purchases directly through the form, without going to an eCommerce site. In this article, we will guide you through the step-by-step WooCommerce and Gravity Forms integration process.
Let’s get started!
Learn the Simplest Way to Use WooCommerce Email Marketing tools in our guide
Benefits of Gravity Forms

With the Gravity Forms plugin, you can create custom forms for WooCommerce, collect data and payments, and automate workflows easily. It has an intuitive visual drag and drop form editor where you can easily select the blocks you want, configure them, and publish them on site. You can also choose the number of columns, customize their width, and content added. The forms can also be conditional by adding and hiding fields depending on the user input.
There is so much more you can achieve with WooCommerce and Gravity Forms integration. Let’s discuss some of its benefits and features.
- Gravity Forms can be used to collect payments, donations, or sell tickets.
- You can also use it for bookings and reservations for your restaurant or hotel.
- Gravity Forms are also a great way to collect customer data and feedback by making it mandatory for customers to fill out the form before and after a purchase.
- You can completely customize the forms, choose how to display products, and prices on the front-end.
But Gravity Forms are only useful when used with third-party plugins. You cannot perform many tasks, like order management, inventory, user restriction, order confirmation, and tracking without the help of add-ons.
Not good with finances? Check out our simple WooCommerce Beginner’s Accounting Guide
WooCommerce Gravity Forms Integration Process
Step 1
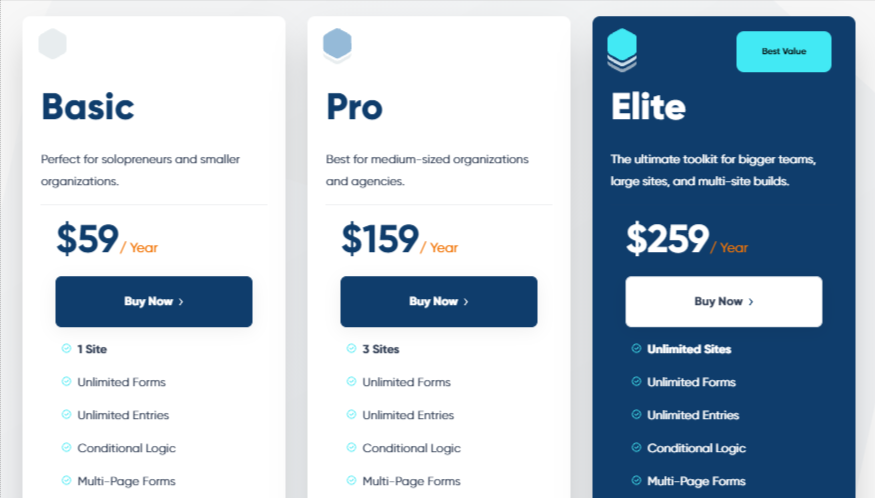
First, you need to download the Gravity Forms plugin and choose from their 3 pricing plans available: Basic ($59/yr), Pro ($159/yr), and Elite ($259/yr). The difference between these plans is the number of sites and the add-ons you can use. Once you have picked out your ideal business plan, download it and create an account.
Step 2
The next step in the WooCommerce Gravity Forms integration process is to configure the setting options under the Global Settings tab. Such as choosing currency, enabling/disabling the toolbar menu, or conflict mode. Once the installation is complete, click on the “create a form” button.

Integrate Apple Pay with WooCommerce and simplify the digital payment process
Step 3
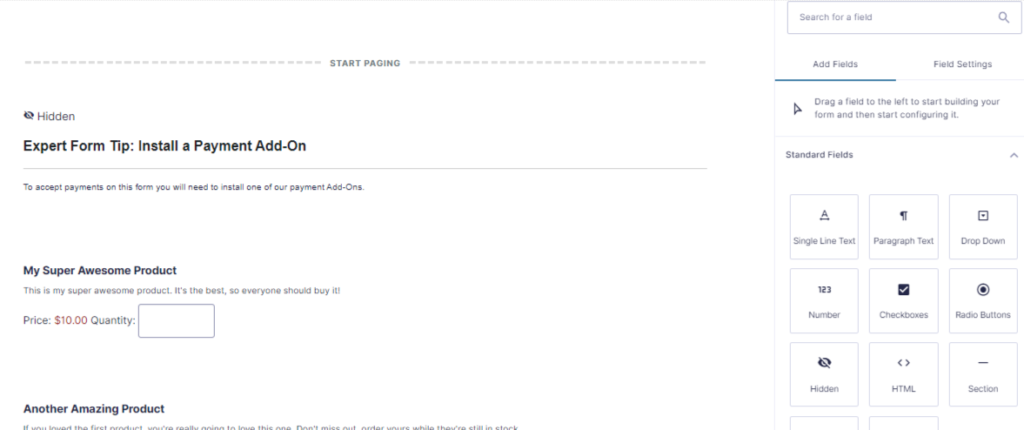
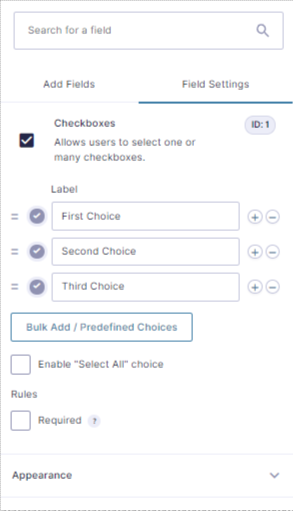
In the “create a form” section, first, you need to give the form a title and add a description. Then, you need to select a field type. Multiple options are available, such as dropdown, checkboxes, multi-select, HTML, radio buttons, text, etc. Next, you need to click on each field and customize its data, name, and details.
You can edit the field’s experience, change labels, add descriptions, etc. Moreover, you can also change the positioning of the fields easily.
Once all editing is done, click on the “Update” button to finish building the form.
Step 4
Now that you have created your first Gravity Form. It’s time to integrate it into your WooCommerce store. For this, you first need to download the Gravity Forms Product Add-ons plugin. Go to WooCommerce > Plugins > Add new. Search for the plugin and then install and activate it.
After activation, you can follow the step-by-step instructions provided by the plugin and easily integrate Gravity Forms on your WooCommerce store.
And that’s it! Now you can create powerful forms to sell products, collect customer data, or for any B2B/B2C purposes.
Increase the average order value by using the best WooCommerce Upselling Techniques
About Gravity Forms Product Add-ons
The reason we are using this plugin for WooCommerce Gravity Forms integration is that it enables you to link any WooCommerce product to a form with conditional logic. You can create forms that have pricing fields, user input prices, conditional button logic, and much more.
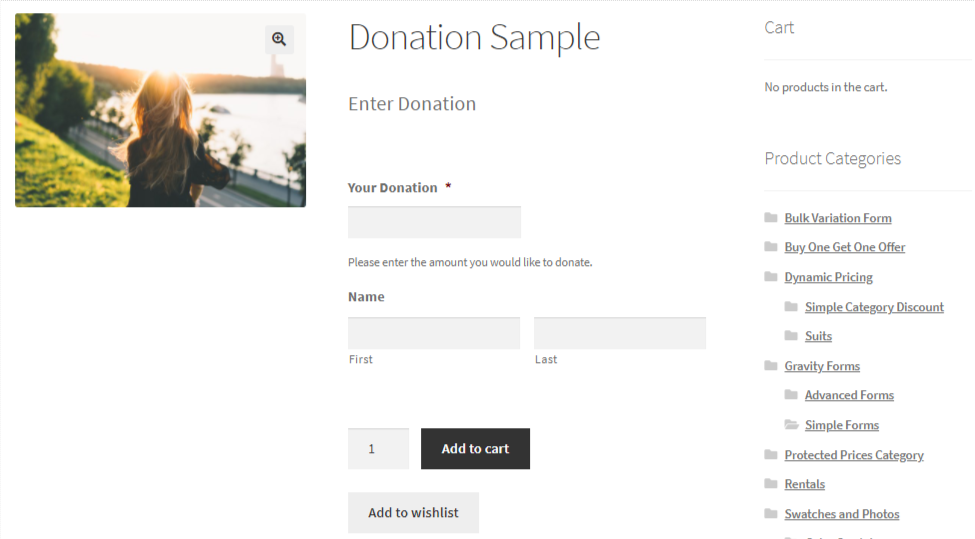
It also gives you complete control of how your fields, prices, and products appear in the form and give customers the convenience of paying directly through the form. Moreover, it automatically performs price calculations, something that you won’t find in ordinary forms.
It also has features like advanced fields, multi-page forms, and required fields.
Learn to Migrate your store from WooCommerce to Shopify in easy simple steps
Wrap-Up
Gravity Forms for WooCommerce are a great alternative for businesses that don’t want to create a highly extensive eCommerce site. You can create advanced and complex forms with the help of this plugin. It is especially useful for businesses that deal with customized products and services. We hope this guide will help you through the integration process.


